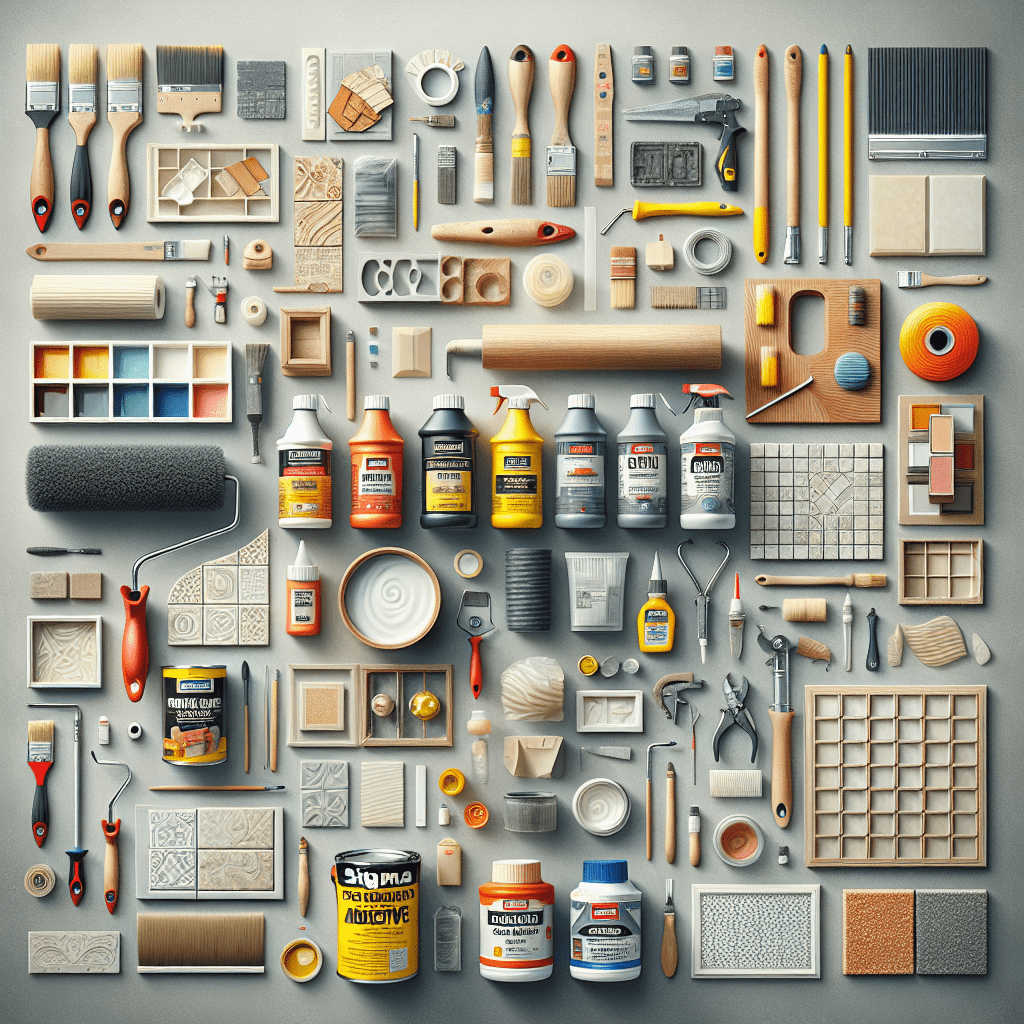
This article delves into various vital materials used in painting and construction, including acrylic paint, oil-based paint, wood glue, tile adhesive, facade paint, clear coats, concrete adhesives, paint rollers, putty powder, and plastic paint. Understanding these materials is essential for anyone looking to achieve durable and aesthetically pleasing results in their projects.
Understanding Paint Types
Acrylic paint and oil-based paint are two of the most commonly used paint types in various artistic and practical applications. While they serve fundamentally the same purpose, which is to provide color and protection to surfaces, they differ greatly in their composition, performance, and best uses. Understanding these differences is essential for achieving the best results in any painting project.
Acrylic paint is known for being water-soluble, which means it can be easily thinned with water and cleaned up with soap and water before it dries. This paint type dries relatively quickly, typically within 20 to 30 minutes, depending on the thickness applied and atmospheric conditions such as humidity and temperature. The quick drying time makes it an excellent choice for artists who prefer to complete their works in a shorter span or for those who wish to layer paints without waiting long periods for each layer to dry. Acrylics are typically available in a range of finishes, including matte, satin, and gloss, allowing for diverse artistic expressions.
The vibrant colors that acrylic paints can produce offer high opacity and excellent lightfastness, meaning they resist fading over time when exposed to light. These qualities make acrylic paint particularly versatile, suitable not only for canvas and paper but also for a wide array of surfaces such as wood, metal, glass, and even fabric. Their ability to adhere well to various substrates means artists and DIY enthusiasts can experiment with multiple mediums and techniques, including pouring, airbrushing, and glazing.
When it comes to application methods, acrylic paints can be used with brushes, palette knives, airbrushes, or sponges. Artists often appreciate the varied texture outcomes that can be achieved, from highly detailed fine lines to broad washes. Due to its flexibility, acrylic paint can also be modified with a variety of additives like gels and mediums, enhancing its visual and textural characteristics. For example, using an acrylic gel medium can impart a three-dimensional quality to a piece, while other mediums may help extend drying time or alter the sheen and consistency.
On the other hand, oil-based paints offer distinct characteristics that set them apart, primarily their solvent-based nature. Instead of water, oil paints are typically thinned with solvents like turpentine or mineral spirits. This solvent composition contributes to slower drying times—often taking several hours to days for a coat to become touch-dry—allowing for extended blending and working times. This quality is particularly cherished by traditional painters who enjoy working with a “wet-on-wet” technique, wherein subsequent layers can be blended directly into the wet paint below. The longer drying period gives artists ample opportunity to create detailed work without the rush to finish before the paint dries.
Oil paints are favored for their rich color depth and unmatched durability once set, providing a hard finish that can withstand the test of time. Paintings done in oils are often more resistant to wear and tear, making them suitable for pieces intended for high-traffic areas or exhibitions. The finish produced by oil paint can range from a high gloss to a soft sheen, depending greatly on the type of oil and the application technique used. The finish can be controlled to some extent, allowing for specific artistic choices and intended effects.
However, the use of oil paints does present certain challenges. The fumes from solvents can be potent, making proper ventilation crucial during application. Additionally, the cleaning process requires more effort since brushes must be cleaned with solvents, which can be less convenient than the water cleanup associated with acrylics. Furthermore, due to their long drying times, oil paints require careful planning to ensure layers do not become muddied or to control the timing of blending colors.
When considering which paint type to use, one should think about the nature of the project. For example, if the goal is to achieve rapid results with vibrant colors on various surfaces, acrylic paint would be the preferable choice. Conversely, a project requiring durability and a rich finish, such as a detailed portrait or a fine-art canvas, may benefit more from the depth and longevity of oil-based paints. Additionally, if the artist intends to work on multiple layers and achieve detailed blending, oil may be favored due to its slower drying characteristics.
It is also worth noting that there are hybrid options available in the market, such as acrylic gouache and water-miscible oil paints, which combine properties of both types. These alternative paints aim to provide the benefits of oil without the extended drying times and cleanup challenges while still retaining the richness expected of oil paint. Depending on the project, these hybrid types might present suitable solutions that offer a compromise between the distinct features of acrylic and oil-based paints.
As we transition from understanding paint types to practical applications, it is essential to consider the interplay between adhesives and paints in construction and repair projects. While acrylics and oils provide the coloring and decorative element, adhesives like wood glue, tile adhesive, and others play a crucial role in ensuring the integrity and functionality of construction projects.
Adhesives for Construction and Repair
In the realm of construction and woodworking, adhesives play a crucial role in ensuring the integrity and longevity of structures and finishes. Each type of adhesive has its unique properties, making them suitable for specific applications. This chapter delves into two essential adhesives: wood glue, widely used in woodworking, and tile adhesive, crucial for securing tiles in construction projects. By understanding their characteristics, application methods, and performance, we can better appreciate their importance in achieving strong, lasting bonds.
Wood glue, often referred to as PVA (polyvinyl acetate) glue, is favored for its ability to bond wooden surfaces effectively. It forms a strong bond that can often be stronger than the wood itself. The primary advantages of wood glue include its ease of use, availability, and versatility. It can be utilized for various woodworking projects, from crafting furniture to constructing cabinets. Most wood glues are water-based, making them easy to clean up and less odorous compared to other adhesive types. They also dry clear, allowing for cleaner finishes without unsightly glue lines.
The drying time of wood glue varies depending on the brand and environmental conditions. However, it typically sets within 30 minutes to an hour and reaches full strength within 24 hours. For maximum effectiveness, it is essential to follow the manufacturer’s instructions regarding application thickness and clamping time. In conditions where moisture resistance is critical, such as in kitchens or bathrooms, water-resistant wood glues are available, designed to withstand exposure to humidity and water.
When applying wood glue, a few techniques enhance the bond’s strength. It’s vital to prepare the surfaces properly before application. The surfaces should be clean, dry, and free of any dust or oils. Applying glue evenly and working it into the surface can create a better bond. After applying glue to one surface, a layer on the opposing surface is often advantageous. Clamping the pieces together until the glue sets is essential as this holds the pieces in the correct position and pressure during drying. In woodworking, it is common to use clamps that distribute pressure evenly across the joint to avoid misalignment or gaps.
Tile adhesive, on the other hand, serves a distinctly different purpose. It is designed to adhere tiles to a substrate, such as cement backer board, drywall, or concrete floors. Tile adhesive comes in various formulations, including thin-set mortar and mastic. Thin-set is a cement-based adhesive commonly used for wall and floor tiles, providing a firmer grip and is unaffected by moisture. Mastic, typically used for wall tiles, is a premixed adhesive that offers more flexibility and is easier to work with, although it may not hold up as well in wet areas.
The choice between thin-set and mastic depends on several factors, including the type of tile, location, and desired tile size. Thin-set is generally preferred for ceramic, porcelain, and natural stone tiles, especially in environments exposed to moisture. Mastic is typically utilized for smaller tiles and indoor applications where moisture exposure is minimal.
Applying tile adhesive requires precision and care. Before tiling, it’s important to prepare the substrate to ensure it’s clean, dry, and flat. For thin-set application, it’s common to utilize a notched trowel, which helps to create ridges in the adhesive for better contact with the tile. The size of the notch on the trowel depends on the size of the tile being installed; larger tiles require larger notches. Applying firm pressure while placing the tile helps to ensure a strong bond, and it’s advisable to twist the tile slightly to embed it fully into the adhesive beneath.
Moreover, it is critical to allow enough curing time for the adhesive. Tile adhesive typically takes 24 hours to cure before grouting can be applied, but this can depend on the specific product used and environmental factors such as humidity and temperature. Using the right techniques during the application phase—like staggered joints and proper leveling—ensures an aesthetically pleasing and durable tiled surface.
When working with wood glue and tile adhesive, certain tips can enhance the effectiveness of your projects. For wood glue, keeping the workspace neat and having a damp cloth handy can help clean up any excess glue before it dries. Additionally, utilizing a roller or brush to spread glue can ensure even coverage, particularly on larger surfaces. Furthermore, experimenting with different wood joinery techniques, such as mortise and tenon or biscuit joints, can optimize the adhesive’s performance and strength in the final assembly.
For tile adhesive, using spacers between tiles is crucial to maintain consistent grout lines and alignment. During installation, checking for level in both directions is essential, particularly for larger tiles, as any imperfections may become amplified in the finished surface. Finally, keeping a tile-cutting tool at the ready can facilitate adjustments as needed, ensuring that the final layout remains cohesive and professional-looking.
Beyond the properties of wood glue and tile adhesive, it is essential to discuss safety precautions when working with these materials. Whenever working with adhesives, it’s vital to ensure proper ventilation in the workspace. While most wood glues are non-toxic and user-friendly, some formulations for tile adhesives can emit fumes that may be harmful in enclosed spaces. Wearing protective gear, such as gloves and masks, is advisable to avoid skin irritation and inhalation of chemicals.
Ultimately, the success of construction and woodworking projects often hinges on the quality and proper application of adhesives. Understanding the nuances of wood glue and tile adhesive allows craftsmen and DIY enthusiasts to achieve durable, lasting results. This comprehensive knowledge empowers individuals to make informed decisions about the materials they utilize, leading to effective bonding in their projects and ensuring structural integrity and aesthetic appeal over time.
As we transition from discussing adhesives to the finishing touches of construction and painting, we recognize how critical these foundational elements are for the overall success of any project. A well-executed installation of wood or tiles paves the way for applying coatings like clear coats and facade paint, enhancing not only the visual appeal but also the durability and longevity of the completed work.
Finishing Touches with Coatings and Rollers
As any seasoned painter or contractor knows, the finishing touches on a project can make all the difference in terms of appearance, longevity, and overall quality. In this context, coatings and rollers serve as essential components that finalize artwork or construction, providing both aesthetic appeal and protective features. Among these, clear coats, facade paint, and putty powder stand out for their unique attributes and applications across a variety of surfaces and environments. Understanding how to effectively use these materials not only enhances the final product but also ensures that it withstands the test of time and challenges presented by the elements.
Clear coats are a vital part of the painting process, serving as the final protective layer that enhances the durability and aesthetic quality of surfaces. Available in different formulations, such as water-based or solvent-based options, clear coats are designed to safeguard the underlying paint, preventing it from fading, chipping, or getting scratched. Water-based clear coats are favored for indoor applications due to their ease of application and lower toxicity. They boast rapid drying times and a low odor, making them suitable for home renovation projects where ventilation might be limited. On the other hand, solvent-based clear coats are generally preferred for outdoor projects due to their superior resistance to weather conditions, UV light, and abrasion.
The application of clear coats can be achieved through various methods, including spray, brush, or roller application. While each method has its benefits, using a roller can provide a more uniform finish, especially on larger surfaces. It is vital to ensure that the underlying paint is fully cured before applying a clear coat; otherwise, the moisture from the thicker layers may lead to imperfections like bubbling or peeling. Additionally, thorough surface preparation is crucial. Surfaces should be cleaned of any dust or debris, and, if necessary, lightly sanded to promote adhesion. When properly applied, a clear coat enhances not only the color and richness of the paint beneath but also imparts a noticeable sheen that can elevate a simple paint job into an elegant finish.
Facade paint, in contrast, caters specifically to the demands of exterior painting jobs. It is formulated to withstand harsh weather conditions, including rain, snow, UV rays, and temperature fluctuations. The properties of facade paint allow it to offer substantial coverage, ensuring that surfaces remain protected while looking aesthetically pleasing. Many brands of facade paint contain special additives that allow for enhanced breathability, counteracting issues such as moisture buildup that could lead to mildew and thus promoting a longer lifespan for exterior walls.
Facade paint also comes in various finishes, from matte to glossy, and the choice largely depends on the building’s location and the desired aesthetic outcome. For regions with heavy rainfall or humidity, a matte finish might be preferred as it tends to hide imperfections and provides a more natural appearance, while a gloss finish may reflect sunlight and enhance colors. When applying facade paint, it is essential to consider the surface texture. If painting over brick or stucco, specific products designed with high viscosity may be beneficial to ensure a thorough covering. Rollers—with specific nap lengths suitable for textured surfaces—can help achieve this effect efficiently, reducing the labor required to achieve a high-quality finish over uneven surfaces.
Putty powder is another integral material in the finishing phase of a project. It serves primarily as a filler for cracks and imperfections in walls or wood surfaces. Made from a combination of gypsum or cement and various additives, putty powder allows for a smooth surface that can enhance the overall appearance of painted finishes. The application of putty is especially crucial in preparation for paint, as it allows for an even base and prevents uneven surfaces from compromising the final look.
To achieve optimal results with putty, the step-by-step application process is key. Initially, the affected area needs to be cleaned and prepped, removing any loose debris or flaking paint. Mixing the putty powder with the appropriate amount of water is the next step, ensuring that the consistency is neither too thick nor too runny. A firm, malleable consistency is ideal for filling gaps without slumping or sagging. Once applied, it is essential to allow sufficient curing time before sanding down the surface. This preparation creates a smooth, level area that will provide a perfect canvas for painting.
Moreover, using the right tools can significantly enhance the efficiency and effectiveness of applying putty powder. Trowels offer excellent control for achieving smooth surfaces, while sanding blocks help refine the finish. For larger areas requiring continuous application, paint rollers might serve as an alternative to achieve coverage more quickly, especially when dealing with significant repairs.
As we consider the overarching role of paint rollers in various applications, it’s important to recognize their efficiency in distributing coatings uniformly across surfaces. Rollers are particularly beneficial when working with clear coats, facade paint, and putty. They cover large areas quickly, minimizing brush strokes and ensuring an even application. Choosing the right type of roller nap is essential; for example, a fine nap roller is preferred for smooth surfaces while a thicker nap roller is better suited for textured surfaces.
In recent years, advancements in roller technology have also introduced options such as fuzz-free rollers, which prevent fluff from getting trapped in painted surfaces, and roller frames with ergonomic designs that help reduce fatigue during prolonged use. Continuous improvement in these tools allows painters to work more efficiently and achieve professional-grade results with less effort.
Additionally, the importance of proper maintenance of rollers cannot be overstated, especially when working with multiple types of coatings. Thorough cleaning between uses prevents cross-contamination of different paints and ensures that each application is as pristine as possible. The right cleaning agents should be employed based on the type of paint previously used—water-based or solvent-based—to maintain the quality of the rollers over time.
Leveraging various materials and tools in the final stages of a project can be a game-changer. The application of clear coat not only prolongs the life of a paint job but enhances its visual appeal, safeguarding the investment made in the work. Facade paint, designed explicitly for exterior surfaces, reinforces durability against the elements, while putty powder rectifies surface imperfections to promote a high-quality finish. The efficiency of paint rollers, coupled with proper application techniques, ensures that these materials are not only used effectively but also achieve the desired outcomes with minimal hassle. By focusing on these finishing touches, any project can reflect a level of professionalism and care that speaks volumes about the craftsmanship behind it.
In summary, mastering the use of acrylic paint, oil-based paint, wood glue, and related materials is fundamental for successful painting and construction projects. By understanding their properties, application techniques, and suitable environments, you can enhance both the aesthetic and functional aspects of your work.